What is the UP Mini 3D Printer?
The UP Mini is an entry-level 3D printer from the UP range. It has a relatively small footprint, with a smaller than average print area – however, the emphasis here is on ease of use, speed and more successful prints over the competition.
Using the standard FDM (fused deposition modelling) process, the UP Mini is targeted at those who want to begin their 3D printing experience without having to build their own printer from a kit form. Or without having to resort to an open-air model printer. In short, it’s an ideal desktop 3D-printing peripheral.
At just £558, it’s surprisingly well priced and comes with an astonishing array of extras.
Related: A complete guide to 3D printing
UP Mini 3D Printer – Design
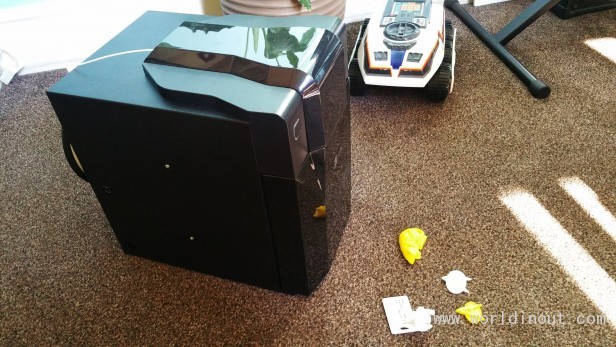
The UP Mini measures a compact 240 x 340 x 355mm and weighs a mere 6kg. The lack of heft is down to the UP Mini's thin plastic body and the fact that it uses an external power brick.
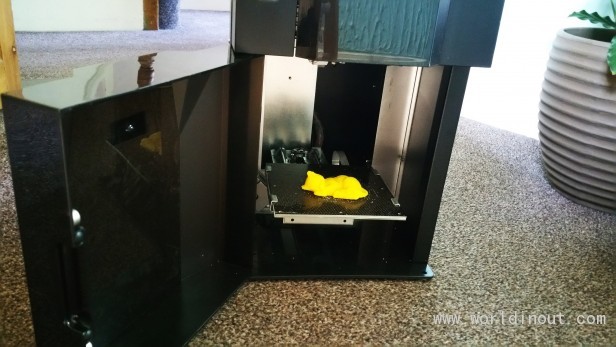
The dominant feature is the printer's oven-like hinged door. When opened it reveals the internal print bed, or platform, a portion of the print head and nozzle, and of course the various anodised aluminium arms that the platform raises, lowers and moves back and forth and side to side.
The platform is relatively small at 120 x 120 x 120mm, so you won't be printing anything huge in the UP Mini 3D unless it's a model built from multiple smaller parts. But you can't expect too much at this end of the price scale.
The oven design is actually one of the more stand-out features of the UP Mini over most of the competition. The design allows the printer to manage the internal heat of the print job, preventing the cooler air from warping the object as it’s printing. Doing so can lead to the object coming loose from the initial printed raft it’s sat on, ultimately colliding with the nozzle as it prints the various layers of the object.
image: http://img.worldinout.com/img/201512/15/135611714.jpg
To the top left of the door is a large, multi-coloured LED power button. Pressing it will launch the printer into an initialise mode, whereby it will travel through the axis before resetting itself to a "Home" position ready for further calibration. The LEDs will also flash blue and red when there’s an active job and when the printer is communication with an attached PC.
Just above the door you’ll find a raised glossy-black plastic section. By lifting this you’ll be able to gain access to the print head and nozzle, and you can feed the filament through a gap at the rear of this section and into the head itself. Again, once it’s lowered it protects the nozzle from cooling down too much from the external air around the printer, which can cause the print to fail.
To one side there are a couple of ports for power and a Type-B USB, and around the rear of the UP Mini you’ll find an on/off switch along with a cut-out rectangle section where you’ll connect the spool arm – which, incidentally, is a 3D-printed object.
Overall it’s a good design, keeping the more technical aspects of the printer behind closed doors, while still retaining a sense of style that wouldn’t look too out of place on a desk in an office or at home.
Related: Formlabs Form 1+ review
UP Mini 3D Printer – Setup
As mentioned earlier, the emphasis with the UP Mini is on ease of use, and it certainly excels in this respect. In the past, I’ve built a Velleman printer from a box of parts, and although it was an extremely satisfying project to complete, it did take the best part of a week and there were tears at some parts of the process. Thankfully, the experience with the UP Mini is very different.
Out of the box you’ll need to install a few components before you can print, though. First remove the foam packaging that protects the delicate internals, chiefly the print platform. Then insert one of the supplied cellboards over the heated print platform – you simply slide it in under the clasps on either side.
Next, you need to attach the print head. Lift the aforementioned glossy lid, and with the print head positioned with the IO pins to the rear of the printer, you gently put the unit in place. UP provides assistance here in the shape of three powerful magnets that hold the print head in place – once its orientation is correct, the print head simply snaps into position. All you need to then do is connect the cable to the pins on the print head with the clasp in the right position.
It's very similar to fitting an IDE drive, going in only one way due to a cut-out section in the clasp.
image: http://img.worldinout.com/img/201512/15/135611414.jpg
The final part is to locate the 3D-printed spool arm and slot it into a rectangular cut-out section on the rear of the printer. Now you'll be able to install the supplied driver and software from UP on to your PC.
With everything in place, you can then connect the UP Mini to a PC via the supplied USB cable and power it up by flicking the switch at the back of the chassis.
When you press the power button at the front of the UP Mini, it will go through a brief set of movements and finish in the "Home" position. What you’ll need to do then is load the UP software and click on 3D Print | Maintenance.
From here you’re required to "extrude" a length of filament, which is done by poking the end of the filament through the gap in the lid and into a small hole in the print head. By applying a little pressure while the nozzle reaches 260oC, the print head will eventually grip the plastic and start to feed it through the mechanism and out of the nozzle.
The final part of the process involves calibrating the height of the platform. For this you remain in the Maintenance section of the software. Set it to 122 to begin, then by eye move slowly up in decimals until the nozzle is a mere fraction of a millimetre from the platform. When done, you click on the "Set Nozzle Height" button and confirm the measurement in a pop-up box.
While all the above may sound a little long-winded, in reality it takes only a few minutes.
The reason I mentioned it in such detail is that the accompanying instructions were a little difficult to decipher at times, being translated from Chinese. Thankfully there are images, and plenty of videos online to help. Overall though, the process is simple and takes only a little common sense to negotiate.